ComfyUI-APISR部署记录
最近公司搞了一个RTX4070 ti super的电脑,空闲的时候可以让我们用来跑跑AI的大模型,因为之前逛Github的时候看到过一个给动漫超分的项目,所以这次就试着搭起来往这台电脑上跑跑啦!最终结果可以搞成功了,为了防止以后忘了怎么搭建,就稍微的记录一下过程吧!
1、下载 ComfyUI以及ComfyUI Manager
ComfyUI Manager:https://github.com/ltdrdata/ComfyUI-Manager
ComfyUI:https://github.com/comfyanonymous/ComfyUI
首先是安装ComfyUI,可以参看项目页面下面的
Installing
Windows
There is a portable standalone build for Windows that should work for running on Nvidia GPUs or for running on your CPU only on the releases page。
然后点击上面的链接,进入到下载界面:
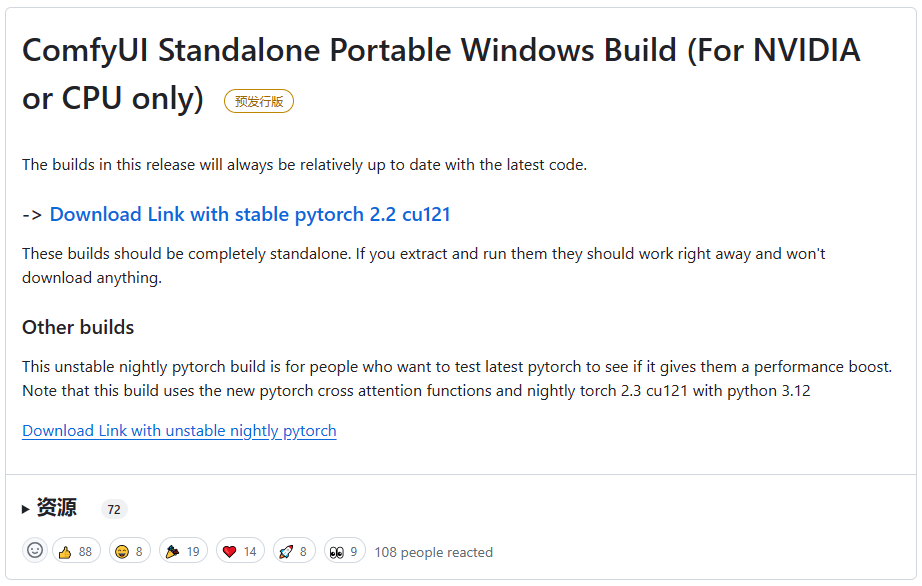
点击上面的Download Link with stable pytorch 2.2 cu121即可,下载下来的是个7z的安装包,解压即可。
然后是安装ComfyUI Manager ,也是在ComfyUI Manager项目页面下面的
Installation
Installation[method1] (General installation method: ComfyUI-Manager only)
To install ComfyUI-Manager in addition to an existing installation of ComfyUI, you can follow the following steps:
- goto
ComfyUI/custom_nodesdir in terminal(cmd)git clone https://github.com/ltdrdata/ComfyUI-Manager.git- Restart ComfyUI
Installation[method2] (Installation for portable ComfyUI version: ComfyUI-Manager only)
- install git
- https://git-scm.com/download/win
- standalone version
- select option: use windows default console window
- 下载 scripts/install-manager-for-portable-version.bat into installed
"ComfyUI_windows_portable"directory- double click
install-manager-for-portable-version.batbatch file

我们参考第二个方法,下载 scripts/install-manager-for-portable-version.bat 到"ComfyUI_windows_portable" 目录下,然后双击运行即可。
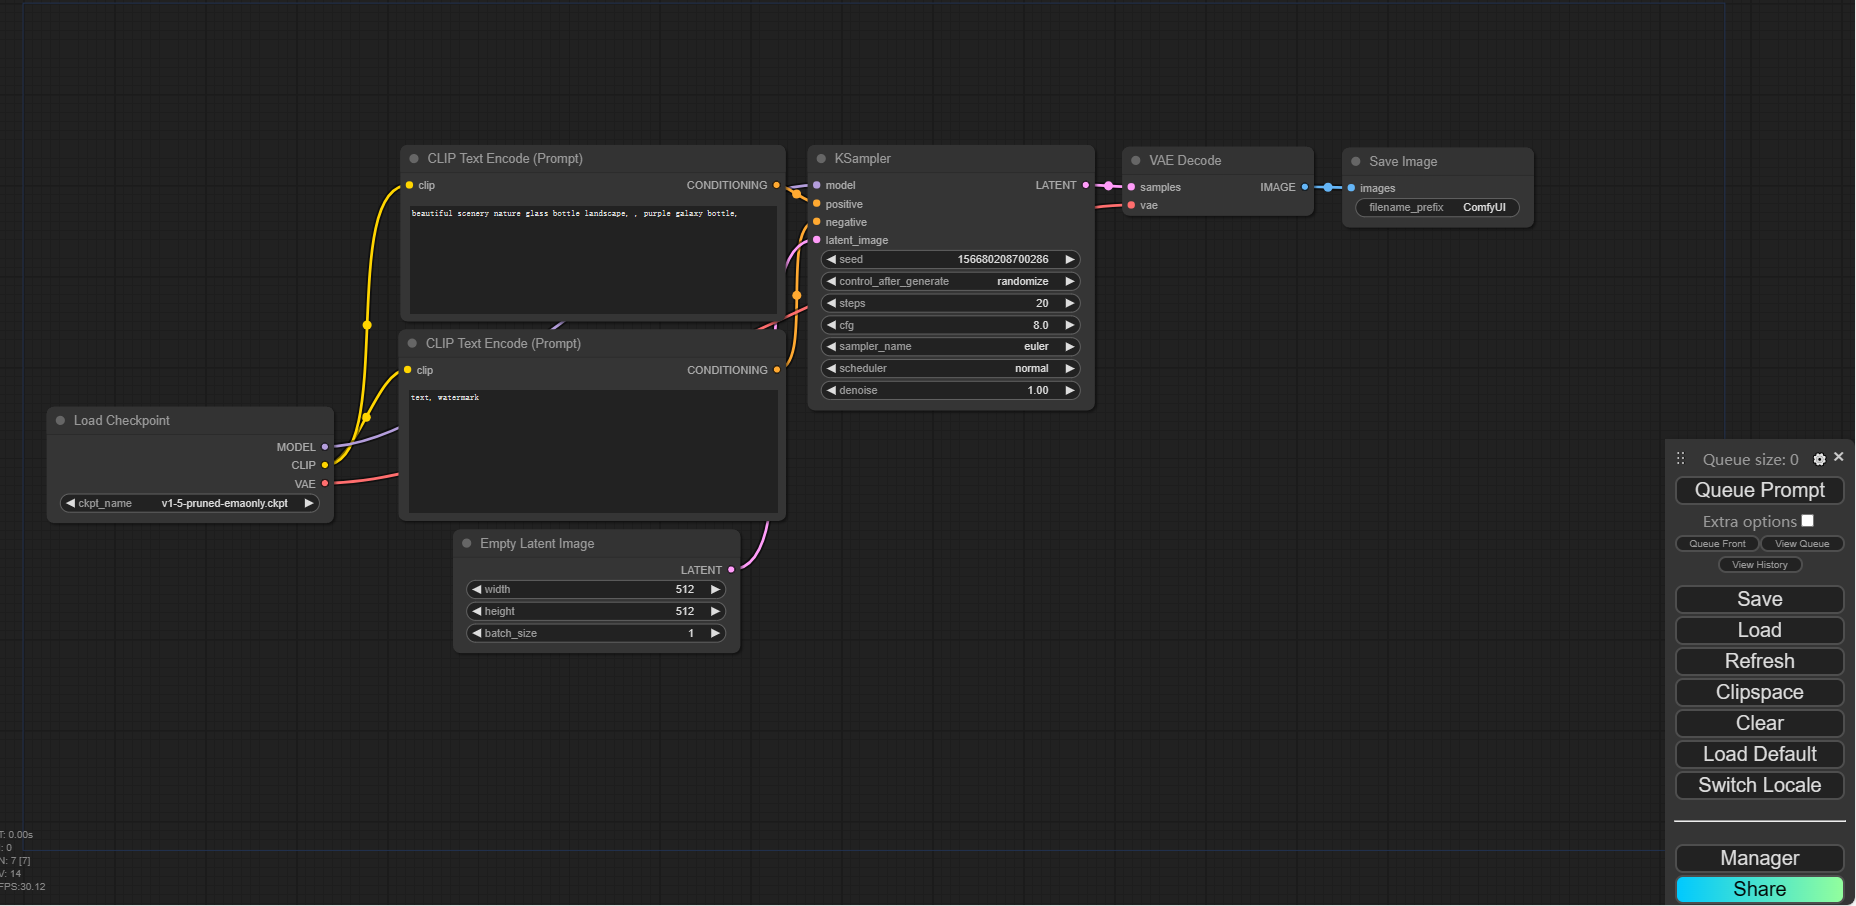
2、运行ComfyUI以及界面汉化
安装完成之后,运行run_nvidia_gpu.bat即可启动ComfyUI
点击右下角的Manager,进入ComfyUI Manager Menu
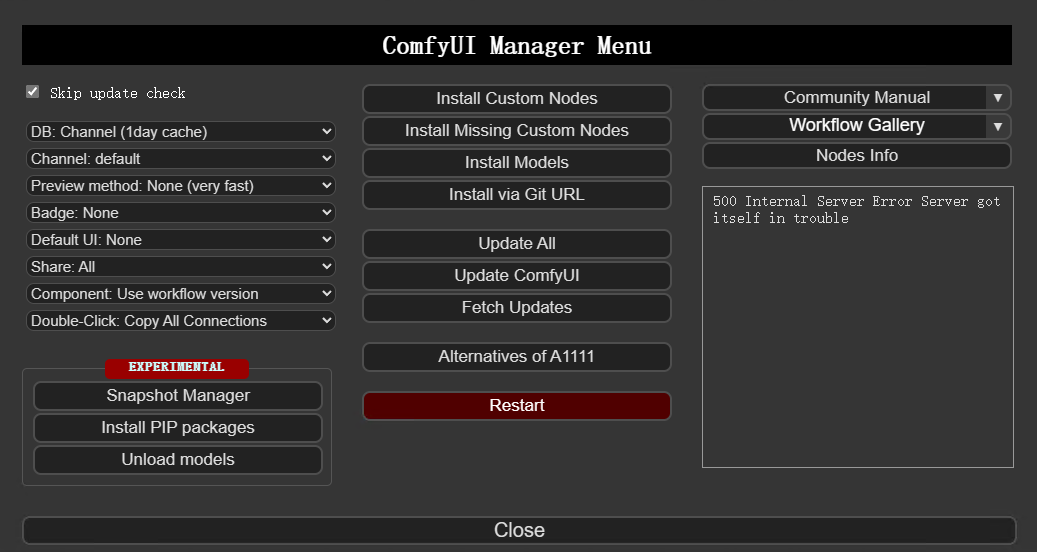
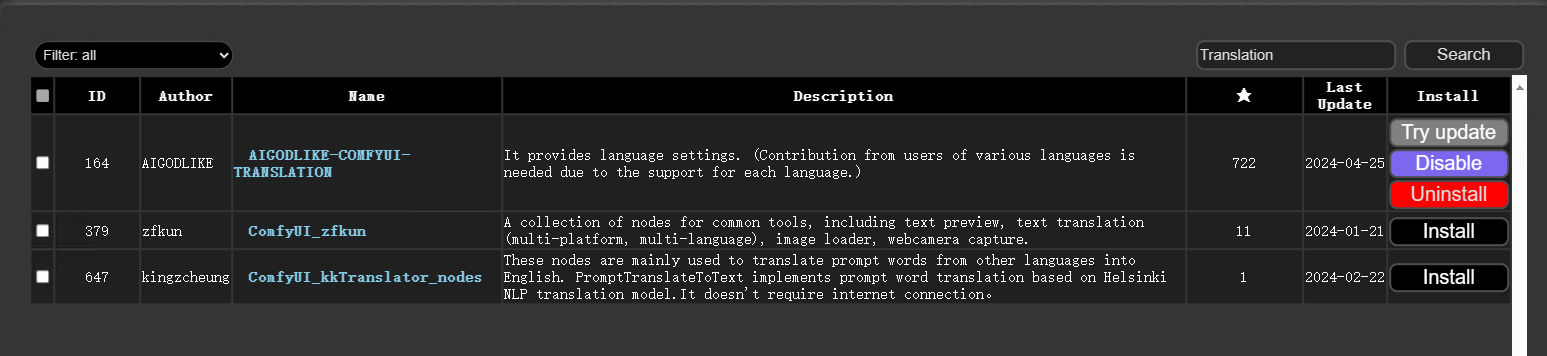
然后选择Install Custom Nodes,接着点击搜索,然后选择列表中出现的第一项并安装
之后会提示重启ComfyUI
重启之后点击右下角菜单的设置按钮,即可在AGLTranslation-langualge中设置中文了
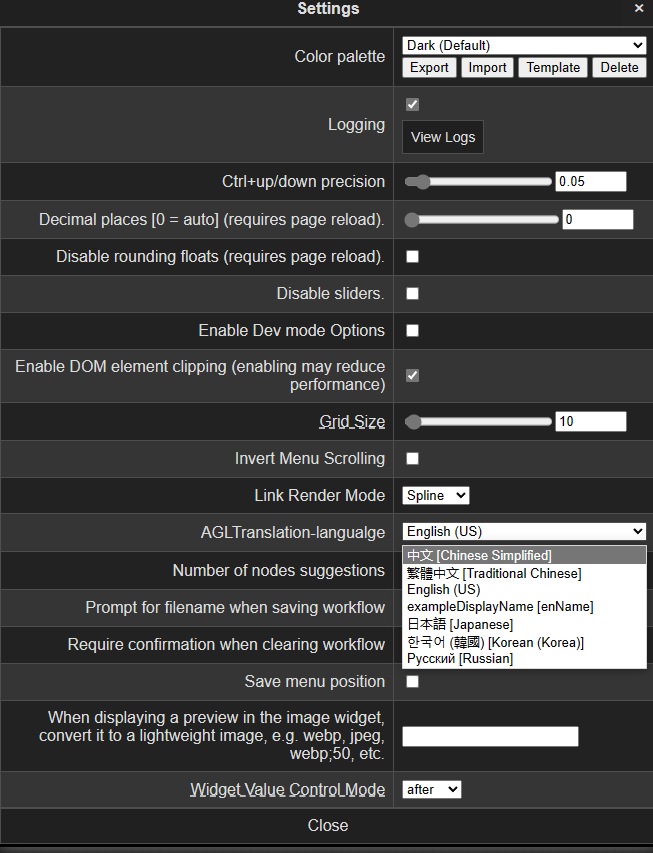
后面也可以通过右下角菜单的Switch Locale按钮来进行语言的切换操作。
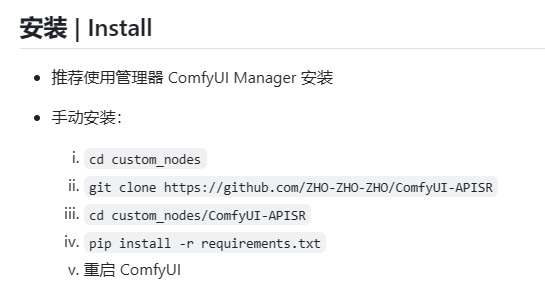
3、安装ComfyUI-APISR
ComfyUI-APISR:https://github.com/ZHO-ZHO-ZHO/ComfyUI-APISR
打开项目链接,我们按照下面推荐的方法进行安装:
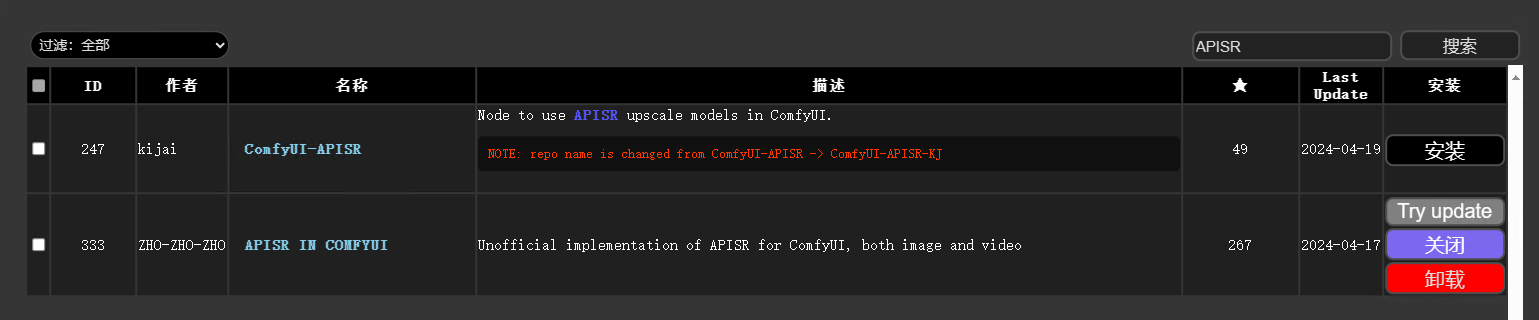
依旧是通过ComfyUI管理器,点击安装节点,搜索APISR,然后安装搜索结果的第二个即可
安装完成之后会提示重启ComfyUI
4、加载工作流并开始测试
打开ComfyUI之后,点击右下角菜单的加载按钮,选择对应的json文件即可
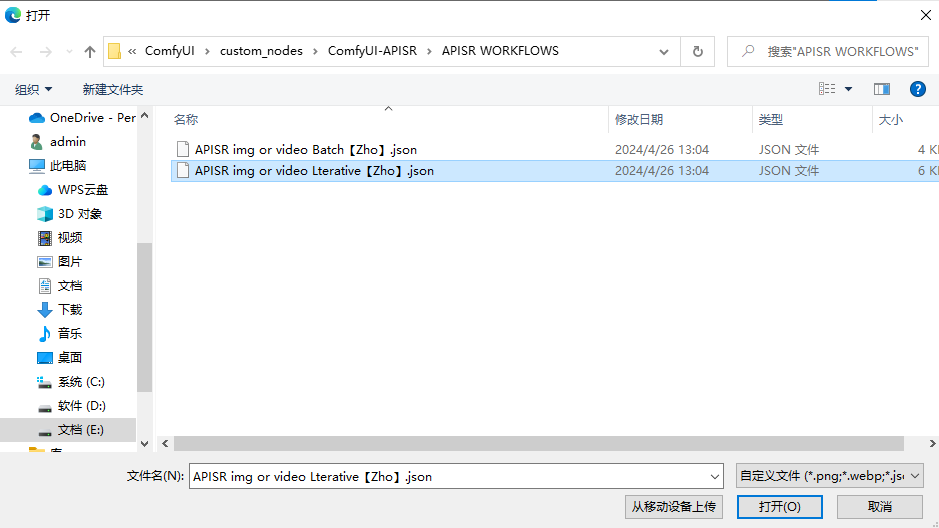
比如我们以选择第一个工作流为例:
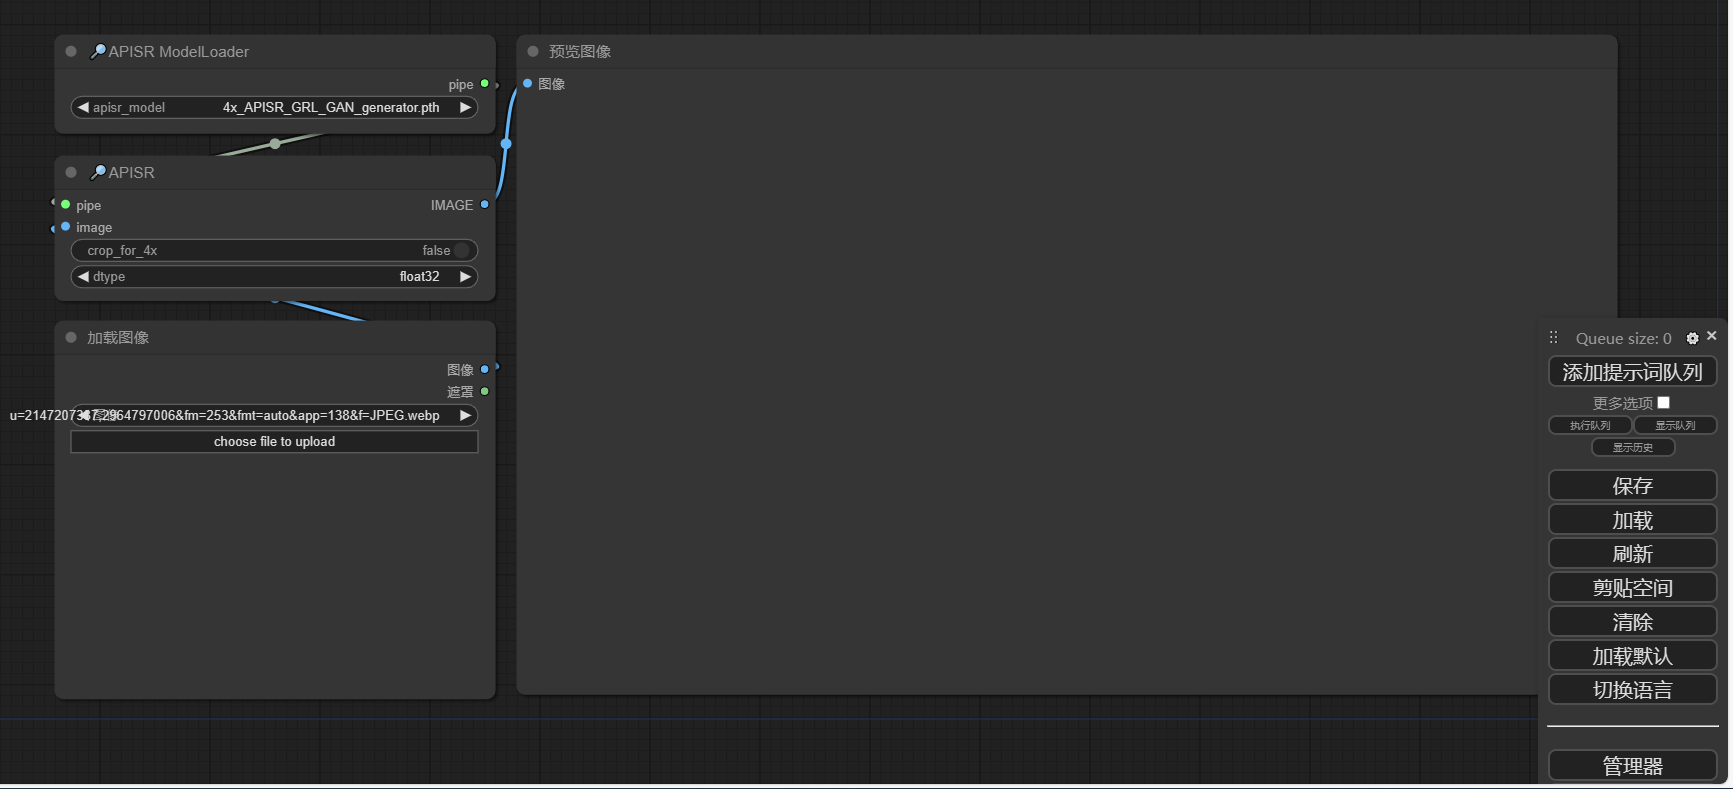
加载工作流之后会出现以上内容,我们选择图像之后,然后点击右下角菜单内的执行队列即可:
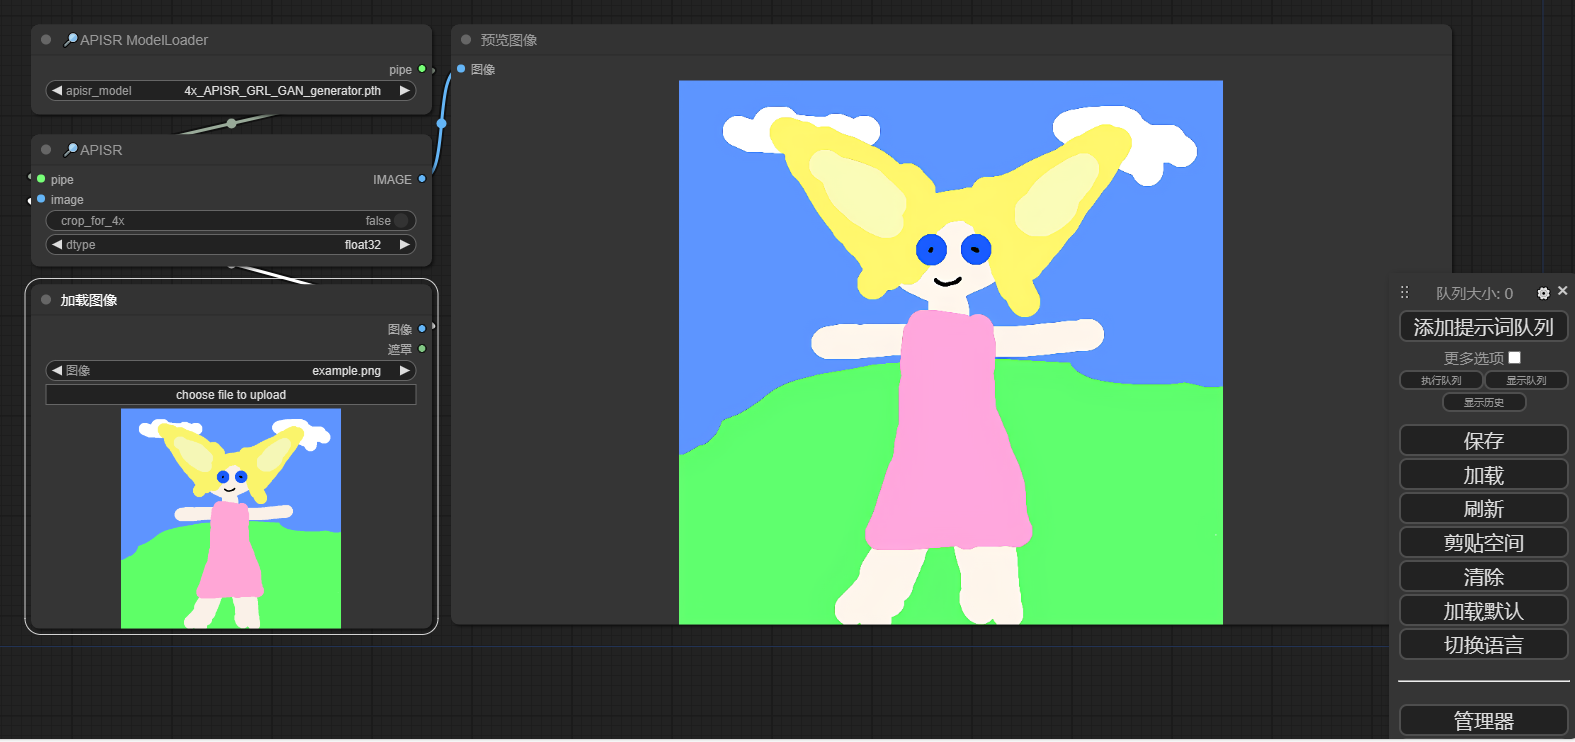
可以看到执行成功了。
5、一些报错即解决方法
在整个过程中,也遇到了一些报错问题
1、加载工作流的时候提示
1 | When loading the graph, the following node types were not found: |
一般来说,安装好节点之后,重启ComfyUI之后,ComfyUI会自动去安装一些依赖,但是有的时候也有可能因为种种原因没有安装成功,或者是依赖没有做好,这个时候就需要通过CMD窗口的启动信息中的报错来判断。
比如说我遇到的第一个错误就是因为ComfyUI-APISR需求python的cv2库,但是它没有安装导致的,解决方法为:
在ComfyUI的根目录打开CMD命令行,输入以下内容进行opencv库的安装
1 | .\python_embeded\python.exe -m pip install opencv-python |
2、报错信息
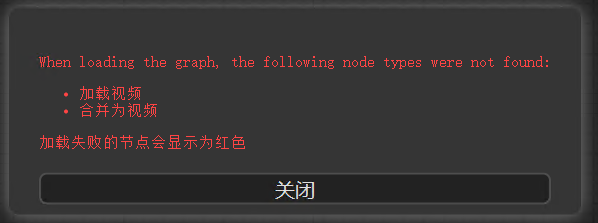
解决方法为:安装ComfyUI-VideoHelperSuite
